Showing posts with label BREAD. Show all posts
BAGUETTE (2)
Bread week was one of the weeks I looked forward to when I was at the Pastry Academy. The sweet aroma of freshly-baked bread that fills the air never failed to tantalize my palate any time of the day. Making this baguette was very exciting because we had to get the ingredients ready a day ahead - the bigga - and that was the first time I learned and used bigga. Perhaps this explains why this baguette is much lighter compared to the previous recipe. It has the irregular holes with a crispy crust. You should be able to break chunks off easily with your hands.
Bigga: 1 day ahead
250g flour
150g water
2g yeast
* MIx all in a bowl. Cover with cling wrap tightly. Leave overnight.
Dough:
500g bread flour
15g salt
2g yeast
350g water
5g improver
First, mix the flour with water. This is what is called 'autolyse'. Leave it in bowl tightly wrapped for 20 minutes. Then, dump everything in a mixer and knead on medium speed around 10 minutes. Proof the dough for 45 minutes.
Flatten the dough on a floured workspace. Stretch and fold from each side (4 stretches and fold altogether). Cover with cling wrap and leave to proof again for 45 minutes.
Next, divide the dough into approximately 370-390 gm each. Round each dough and again, cover with cling wrap. Leave to rest for 20 minutes.
The next step is shapint the baguettes. Flatten the dough, and roll it (like rolling a swiss roll, but press as each roll is complete). Roll the ctlindrical dough with your hands to reach the diameter and length that you desire. Spray with water and leave to proof for 30 minutes. Using a very sharp knife, make a few diagonal incisions on top of each loaf. Spray again generously and bake in a preheated 230C combi oven or 210C normal oven.
This recipe takes that 'extra' effort but rest-assured, the result is worth every drop of sweat that comes along in making it!
Cinnabon and my homemade cinnamon rolls...
Spending RM16 on 4 small pieces of cinnamon roll at Cinnabon is worth every bite. Unfortunately, they don't run a franchise here in the East Coast and I needed help with my intense craving for the fluffiest and moist cinnamon rolls with generous creamy topping, sprinkled with the crunchiest toasted pecans. But since Cinnabon wasn't within 100 km drive I had to head into my kitchen and start whipping up things to soothe my desperate craving. The rolls turned out to be awesomely tender and tasty! And I'm sharing this with all you bread-cravers out there!
In a mixing bowl, put 500g of bread flour, 10g salt, 15g yeast, 60f sugar, 150g milk and 2 large eggs. Use a dough hook and knead until a ball of dough is formed. Then add in 100g butter. Knead again and when all of the butter is incorporated cover the bowl with a cling wrap and let it rest for 30 minutes.
On a flour-dusted work surface, knock back the dough and roll it into a cylinder. Using a rolling pin, flatten the dough into a rectangular shape. Spread the cinnamon filling generously onto the dough and start rolling. Cut into the desired thickness and let proof for at least 45 minutes. Glaze with egg wash and bake at 190C for 15-18 minutes.
While it's still hot, glaze it with cinnamon topping- beat 100g butter, 100g cream cheese (room temperature), 300g sifted icing sugar and few drops of vanilla. Sprinkle with the nuts that you like (walnuts will do for me) and there you go...tender, warm and delicious homemade cinnamon rolls!
PIZZA (Italian Bread) - Professional Chef
The base belongs to Gisslen's recipe. The topping is accessorized the kids' choices nad lots and lots of cheese. I used Cheddar and Mozzarella. Cheddar adds saltiness to my pizza and the latter gives that oozing cheesy sensation. A good combo. Baking it - Make sure you heat the oven hot first (250C at least) before baking your pizza. Otherwise, your pizza crust will trap moisture and soggy will it become.
The crust :
- Mix 750g bread flour + 20g fresh yeast (or 8g instant yeast) + 15g salt
- Using a dough hook, add water 460g to the flour mixture. Mix low speed, then medium till a the dough is uniformly mixed. Then add 18g of olive or vegetable oil. Mix medium speed for 10 minutes.
- Leave for one 1 1/2 hours. If weather is cold, I would leave it to double in volume in the oven with the door closed. This helps.
- Scale it as following:
12 inch pizza - 350g dough
14 inch pizza - 450g dough
16inch pizza - 600g dough
- Round each portion and rest them for 10 minutes.
- Roll, shape and stretch (good luck at this step)
- At this point you can bake them first if you want to freeze them for later use (10 minutes in a preheated oven 290C)
- Or you can straightaway apply the sauce and sprinkle the toppings. Actually I like mine pre-baked. Then comes the cheese. Mozzarella must come last.
- Make sure the oven is hot (290C, preheat for 10 minutes to be safe) then bake until the crust turns light brown and the mozzarella melts beautifully on top.
- I also find it better to use pizza pan with holes at the bottom. This makes a crispy crust.
Tomato sauce (my recipe)
In a hot pan, add a little bit of olive oil, stir fry one chopped Holland onion and a crushed garlic. I would also add a bit of chili paste (just to add some zing to it). Once fragrant, add 1/2 tsp basil, blended fresh tomatoes (about 5 large ones) + a can of tomato puree. Salt and pepper to taste. Stir and cook till mixture becomes thick. Too thin will make a soggy pizza.
SWEET BUN
I used to fail in making bread of any kind. The dozens of recipes I've tried yielded no results and at one point, I lost interest altogether. Seeing my mom kneading the dough and sweating all over only confirmed that bread making was a tedious and laborious effort. Besides, why fret when bakeries can be found almost anywhere, meaning buns or artisan breads were only a drive away. So I gave up bread-making and stick to store-bought bread. The mixer I had was only meant for cakes and cookies. And the dough hook sat in my kitchen drawer, spotless and untouched.
Something hit me one day. The smell of that wonderful aroma of bread permeated my entire kitchen, not once..but often. My neighour was baking bread...and I, being her sweet and loving neighbour surely got my share. Buns of different shapes and fillings, soft white sandwich loaves, and my favourite, the 'paung bakar', the local buns, baked traditionally using woodfire and coconut fibre. Her secret: she went for classes. Bread baking classes. And she started selling home-made bread ever since. Now why didn't I think of that.
So there I was on that very night, googling for classes venues and schedules. I went for my first lesson...pretty intimidated by others at first. The next year, I went for my second class and a year later, my third class. I simply hunkered down and practiced everything about bread baking I learned (still have a lot to learn)...And bread baking now has become a routine (almost every other day). And the family's favourite? Sweet bun, sandwich loaf and baguette.
I would leave my Kitchen Aid to do the bulk of the kneading. And I have little hands to help me shape and fill the buns. So bread making now is fun indeed.
And my sweet bun recipe? Here goes....
In a bowl, measure and mix using dough hook - 600g bread flour/high protein flour, 12g yeast, 6g bread improver, 6 g salt, 150g sugar, 20g milk powder
Add to bowl - 280g plain cold water, 1 large egg, 20g butter vanilla - beat until mixture forms a dough
Add - 60g butter - Beat for 20 minutes or until the dough comes away clean from your fingers when squeezed)
Divide dough into 40g, round, fill and top each ball before spraying it with plain water (to prevent the outer layer from drying out)
For the red bean bun - flatten the round dough and fill red bean paste in it, round it again. Flatten the ball a bit with your palm and using scissors, make ten strips on the edges of the ball.
For the almond and sugar bun - Divide the 40g dough ball into 3 equal parts. Roll each part into 6 inches long. Plait. Sprinkle with sugar and toasted slivered almonds).
Proof the dough for 1 1/2 hours.
Glaze (1 egg + 1/2 cup fresh milk). Brush lightly. DO NOT force the brush on buns.
Preheat oven to 190C. Bake for 8 - 9 minutes or until the buns turn golden brown. Rotate the tray halfway through baking if necessary for even browning.
The same recipe can be used for sausage buns.
BAGUETTE - Professional Baking 5th edition
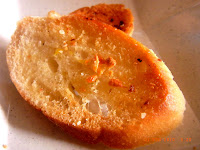
Slices of buttered baguettes, sprinkled with grated garlic and grilled to perfection is an awesome snack anytime of the day. Where I am staying, fresh baguettes are rarely sold in the market. A 40-minute drive to the nearest hypermarket is my only hope to get some (frozen ones though...and unlucky sometimes). So I would normally make some myself, and freeze them well for that baguette-craving moment. And today I decided to follow Gisslen's recipe.
The result: A crusty baguette with many irregular holes seen through each slice cut, close to the store-bought ones. And we had beautiful grilled golden garlic-butter slices for tea. Awesome!
Bread flour 1000g
Salt 20g
Yeast, fresh 25g
Water 6000g
Method:
1. Mixing
Straight dough method - Mix yeast with 50g of water (38C). Put into mixing bowl. Add flour and mix. Then add other ingredients to it and mix to a smooth developed dough (12 minutes 1st speed - I used speed 3 using my kitchen aid mixer).
2. Fermentation
60 minutes at 27C
3. Makeup
Scale dough at 320g (I divided into 5 equal weights). Round each into a ball. Flatten the relaxed dough into an oval shape with a rolling pin. Stretch the oval with the hands to lengthen it. Roll up tightly and seal the seam well. Roll the loaf on the bench under the palms of the hands to even out the shape. This will produce an elongated, oval-shaped loaf. The ends should be tapered and rounded, not pointed.
If a longer, thinner loaf is desired, relax these units again for a few minutes. Flatten them with the palms of the hands and stretch the dough lightly to increase its length.Once again, roll up tightly and seal the seam well. Roll on the bench under the palms of the hands to even it out and to stretch it to the desired shape and length.
Place seam-side down on pans dusted with cornmeal (I used plain flour). Proof. Wash with water. Slash with diagonal cuts or one lengthwise cut; this can be done before or after proofing.
4. Baking
475F/250C for 20 minutes with steam.
BREAD BAKING...An Artisan's Perspective - Daniel T DiMuzio

Another book in my collection, written by an expert in artisan bread-baking. More info can be found here.
This book is more focused on bread baking, with detail and well-structured information. Am keen to try his baguettes recipe.
POTATO BREAD - Sarah Phillips BAKING 911
I made her 'potato bread' the other day. It came out lovely and fluffy and went perfect with our dinner soup.
For $19.95 (premium membership) per year, baking911 is worth subscribing to.
Subscribe to:
Posts (Atom)